如何编译Missionplanner1.3.83地面站?
一、前言
编译MP地面站需要使用VS2022社区版软件进行编译,具体可以参考MP地面站的编译说明文档:
https://github.com/ArduPilot/MissionPlanner?tab=readme-ov-file#how-to-compile
二、下载Missionplanner地面站源码
打开WSL2虚拟机,本人将Missionplanner的源码下载放到e盘中(如果要放到其他盘符,可自行修改),在Linux终端中执行以下命令:
cd /mnt/e从github下载Missionplanner的源码,执行以下命令
git clone https://github.com/ArduPilot/MissionPlanner.git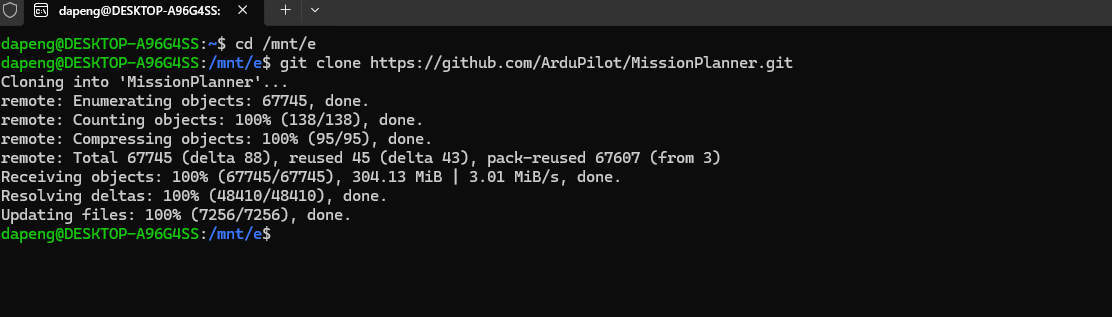
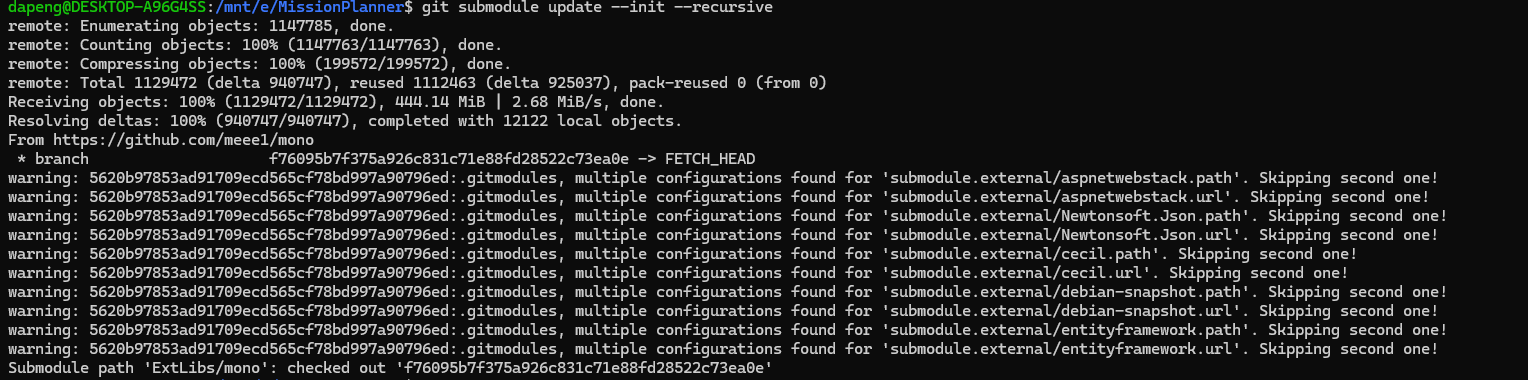
进入Missionplanner文件夹下,执行模块更新命令
git submodule update --init --recursive执行后会有一些警告,并不影响!
三、安装VS2022软件
VS2022社区版安装包如下:
vs_Community.exe (4.25 MB)
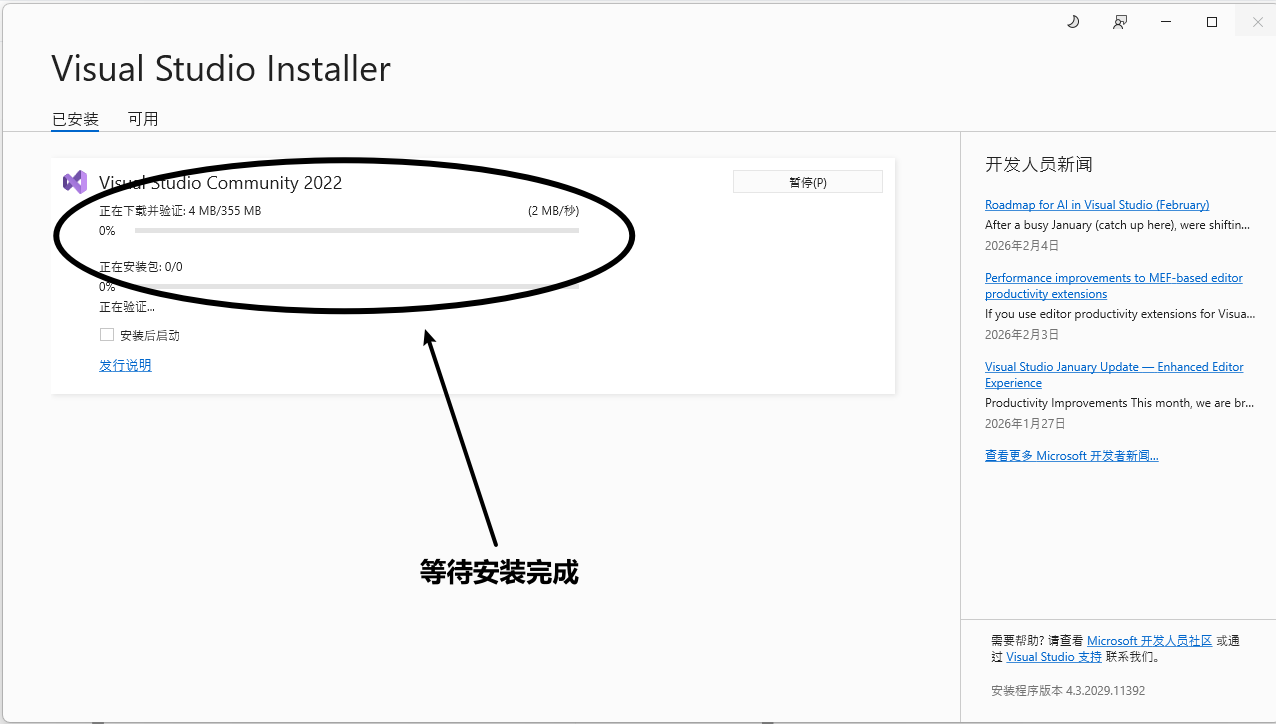
将其保存至电脑本地,双击即可启动安装:
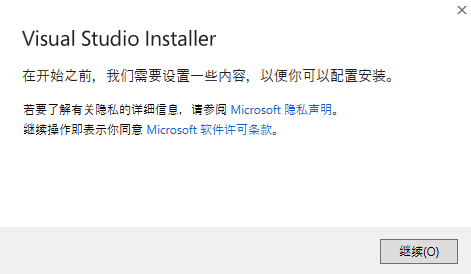

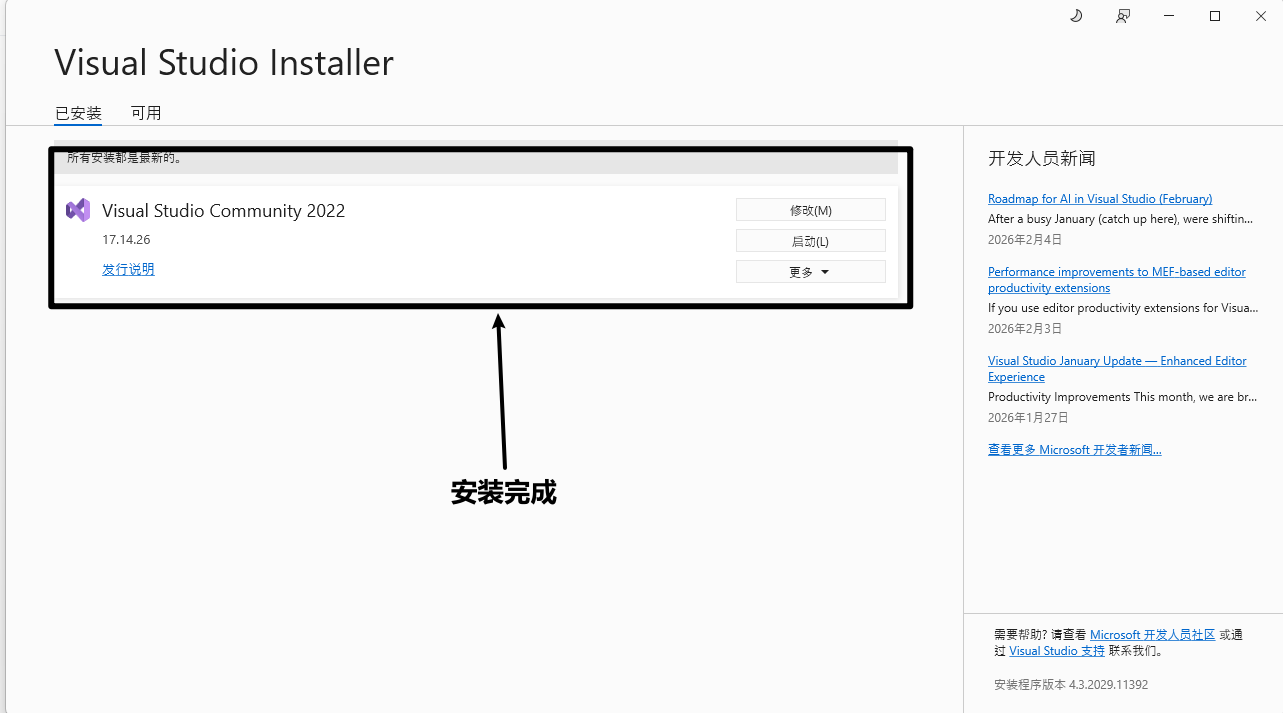
首先进行软件安装,勾选以下这个选项,后面会通过一个配置文件对所有编译所需组件进行一次性打包安装。

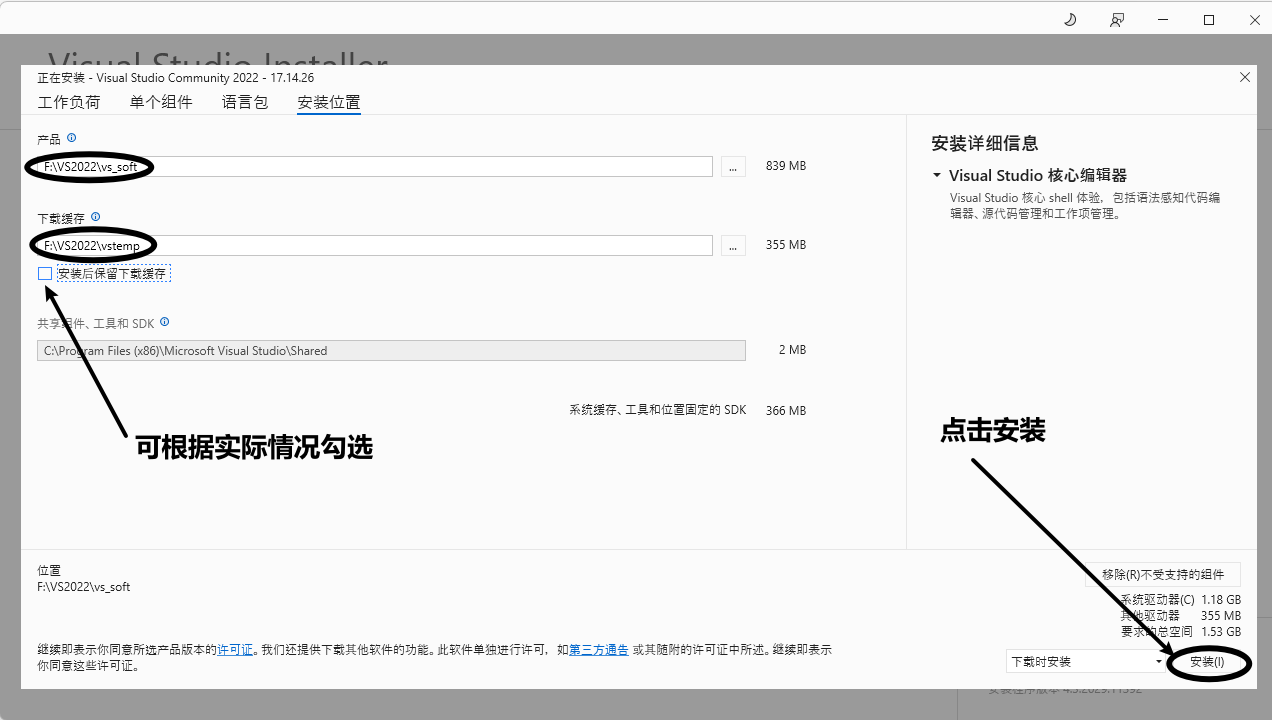
选择软件的安装路径、下载缓存。
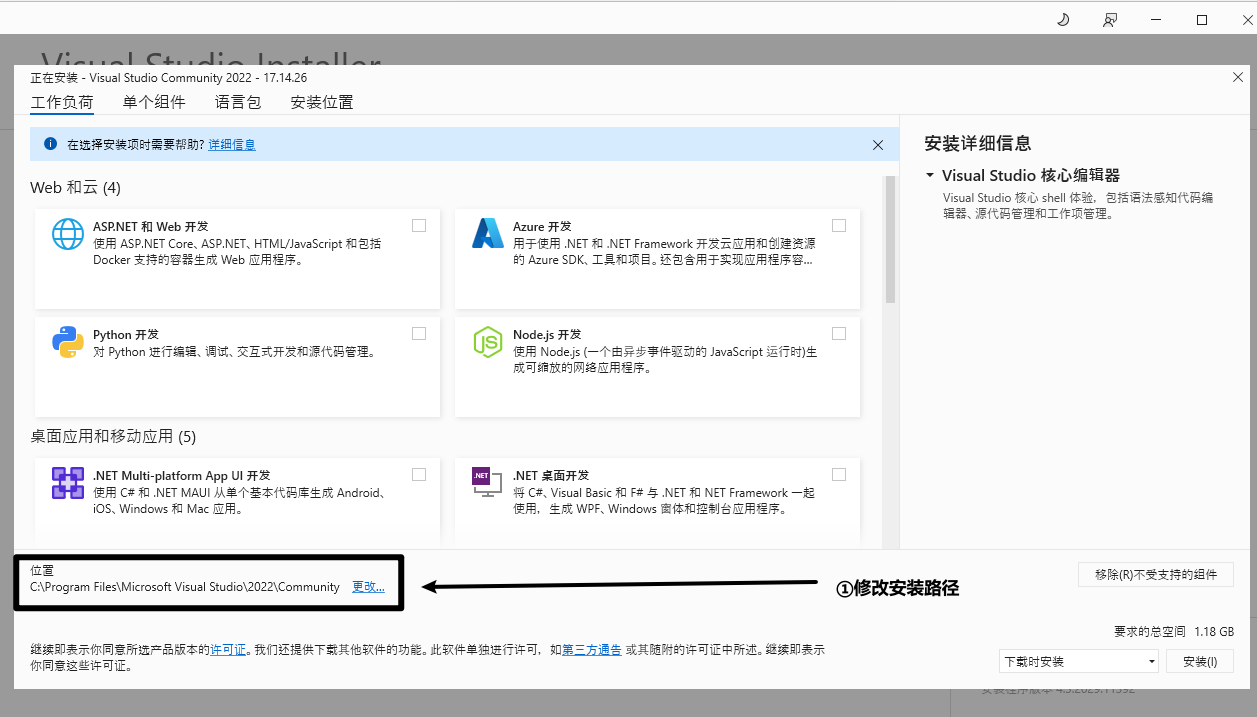
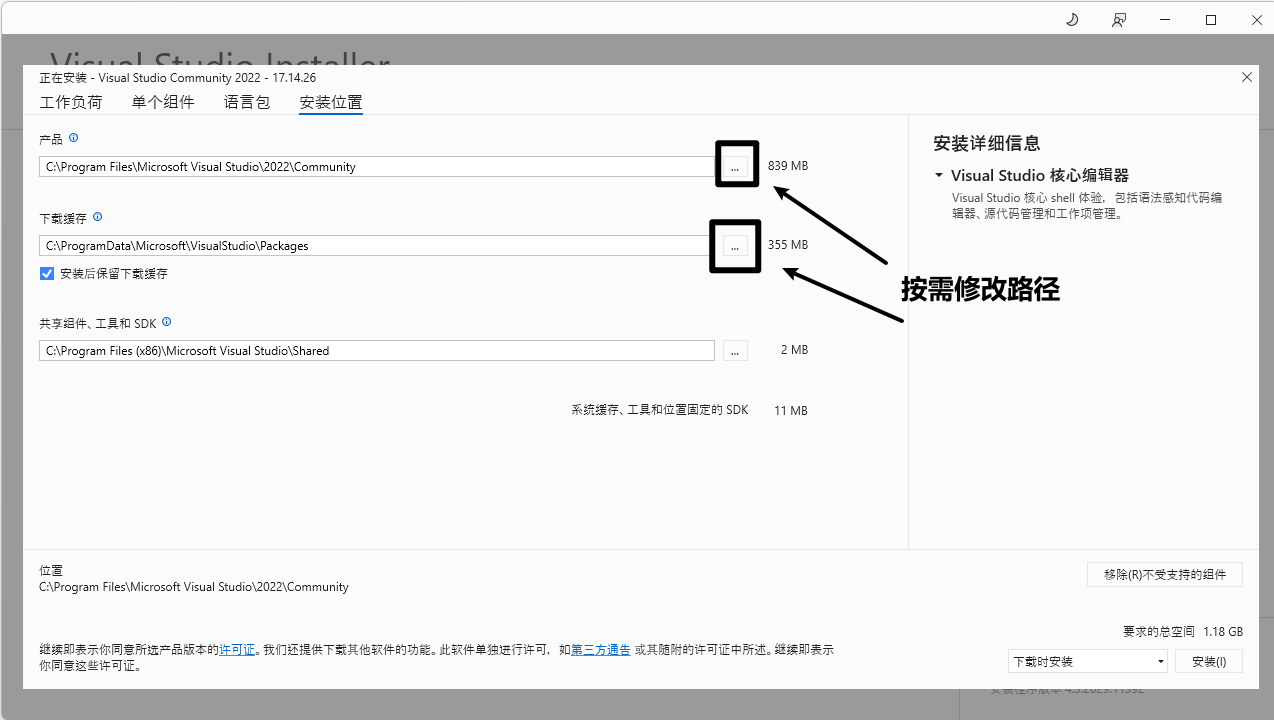
本人分别将软件和缓存安装在以下路径,大家可以根据自己需求进行安装。
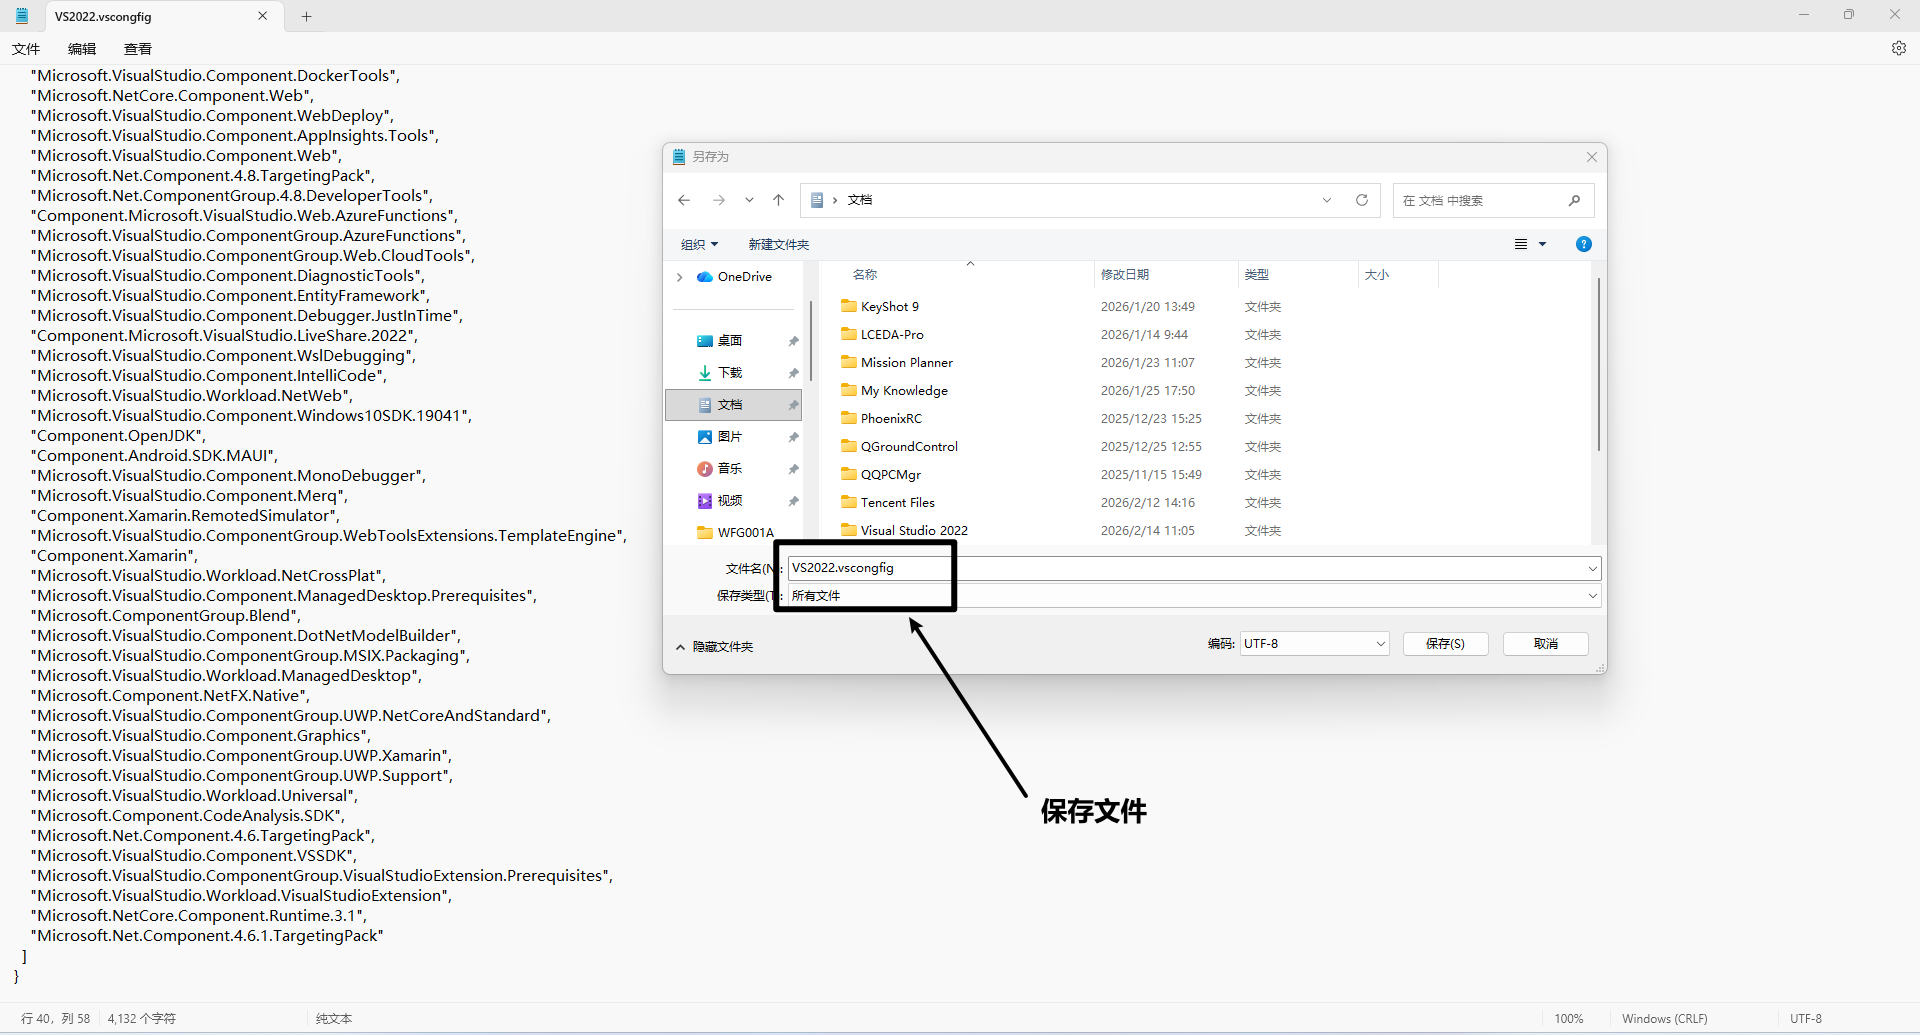
四、保存VS2022的编译配置文件
上述步骤仅仅是完成了最基础VS2022软件的安装,然而编译Missionplanner地面站该需要各种各样的插件支持才能进行编译,否则会报错。
由于地面站软件会一直更新添加新的功能,以编译Missionplanner1.3.83地面站为例,官方wiki提供了编译地面站所需的VS2022配置文件。
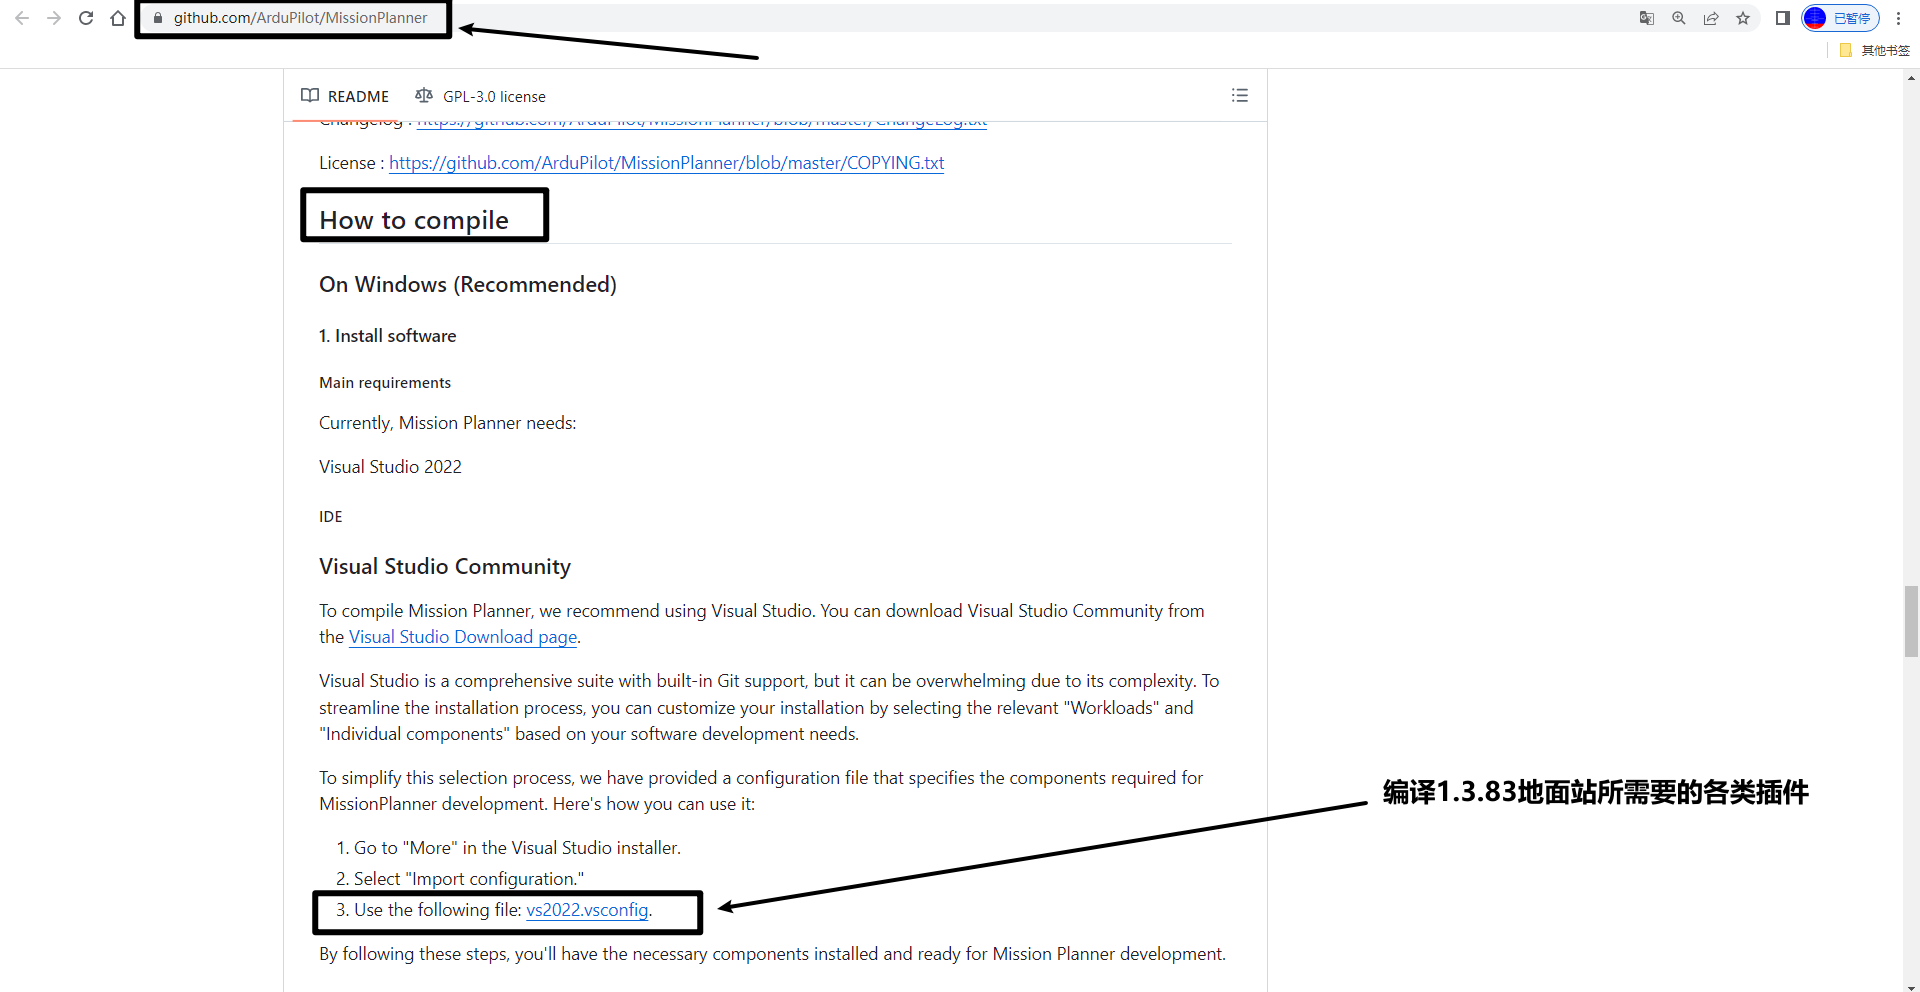
其VS2022.vscongfig配置文件,内容如下:
"version": "1.0",
"components": [
"Microsoft.VisualStudio.Component.CoreEditor",
"Microsoft.VisualStudio.Workload.CoreEditor",
"Microsoft.Net.Component.4.8.SDK",
"Microsoft.Net.Component.4.7.2.TargetingPack",
"Microsoft.Net.ComponentGroup.DevelopmentPrerequisites",
"Microsoft.VisualStudio.Component.TypeScript.TSServer",
"Microsoft.VisualStudio.ComponentGroup.WebToolsExtensions",
"Microsoft.VisualStudio.Component.JavaScript.TypeScript",
"Microsoft.VisualStudio.Component.JavaScript.Diagnostics",
"Microsoft.VisualStudio.Component.Roslyn.Compiler",
"Microsoft.Component.MSBuild",
"Microsoft.VisualStudio.Component.Roslyn.LanguageServices",
"Microsoft.VisualStudio.Component.TextTemplating",
"Component.Microsoft.VisualStudio.RazorExtension",
"Microsoft.VisualStudio.Component.IISExpress",
"Microsoft.VisualStudio.Component.NuGet",
"Microsoft.VisualStudio.Component.MSODBC.SQL",
"Microsoft.VisualStudio.Component.SQL.LocalDB.Runtime",
"Microsoft.VisualStudio.Component.Common.Azure.Tools",
"Microsoft.VisualStudio.Component.SQL.CLR",
"Microsoft.VisualStudio.Component.MSSQL.CMDLnUtils",
"Microsoft.Component.ClickOnce",
"Microsoft.VisualStudio.Component.ManagedDesktop.Core",
"Microsoft.VisualStudio.Component.SQL.SSDT",
"Microsoft.VisualStudio.Component.SQL.DataSources",
"Component.Microsoft.Web.LibraryManager",
"Component.Microsoft.WebTools.BrowserLink.WebLivePreview",
"Microsoft.VisualStudio.ComponentGroup.Web",
"Microsoft.NetCore.Component.Runtime.6.0",
"Microsoft.NetCore.Component.SDK",
"Microsoft.VisualStudio.Component.FSharp",
"Microsoft.ComponentGroup.ClickOnce.Publish",
"Microsoft.NetCore.Component.DevelopmentTools",
"Microsoft.VisualStudio.Component.FSharp.WebTemplates",
"Microsoft.VisualStudio.Component.DockerTools",
"Microsoft.NetCore.Component.Web",
"Microsoft.VisualStudio.Component.WebDeploy",
"Microsoft.VisualStudio.Component.AppInsights.Tools",
"Microsoft.VisualStudio.Component.Web",
"Microsoft.Net.Component.4.8.TargetingPack",
"Microsoft.Net.ComponentGroup.4.8.DeveloperTools",
"Component.Microsoft.VisualStudio.Web.AzureFunctions",
"Microsoft.VisualStudio.ComponentGroup.AzureFunctions",
"Microsoft.VisualStudio.ComponentGroup.Web.CloudTools",
"Microsoft.VisualStudio.Component.DiagnosticTools",
"Microsoft.VisualStudio.Component.EntityFramework",
"Microsoft.VisualStudio.Component.Debugger.JustInTime",
"Component.Microsoft.VisualStudio.LiveShare.2022",
"Microsoft.VisualStudio.Component.WslDebugging",
"Microsoft.VisualStudio.Component.IntelliCode",
"Microsoft.VisualStudio.Workload.NetWeb",
"Microsoft.VisualStudio.Component.Windows10SDK.19041",
"Component.OpenJDK",
"Component.Android.SDK.MAUI",
"Microsoft.VisualStudio.Component.MonoDebugger",
"Microsoft.VisualStudio.Component.Merq",
"Component.Xamarin.RemotedSimulator",
"Microsoft.VisualStudio.ComponentGroup.WebToolsExtensions.TemplateEngine",
"Component.Xamarin",
"Microsoft.VisualStudio.Workload.NetCrossPlat",
"Microsoft.VisualStudio.Component.ManagedDesktop.Prerequisites",
"Microsoft.ComponentGroup.Blend",
"Microsoft.VisualStudio.Component.DotNetModelBuilder",
"Microsoft.VisualStudio.ComponentGroup.MSIX.Packaging",
"Microsoft.VisualStudio.Workload.ManagedDesktop",
"Microsoft.Component.NetFX.Native",
"Microsoft.VisualStudio.ComponentGroup.UWP.NetCoreAndStandard",
"Microsoft.VisualStudio.Component.Graphics",
"Microsoft.VisualStudio.ComponentGroup.UWP.Xamarin",
"Microsoft.VisualStudio.ComponentGroup.UWP.Support",
"Microsoft.VisualStudio.Workload.Universal",
"Microsoft.Component.CodeAnalysis.SDK",
"Microsoft.Net.Component.4.6.TargetingPack",
"Microsoft.VisualStudio.Component.VSSDK",
"Microsoft.VisualStudio.ComponentGroup.VisualStudioExtension.Prerequisites",
"Microsoft.VisualStudio.Workload.VisualStudioExtension",
"Microsoft.NetCore.Component.Runtime.3.1",
"Microsoft.Net.Component.4.6.1.TargetingPack"
]
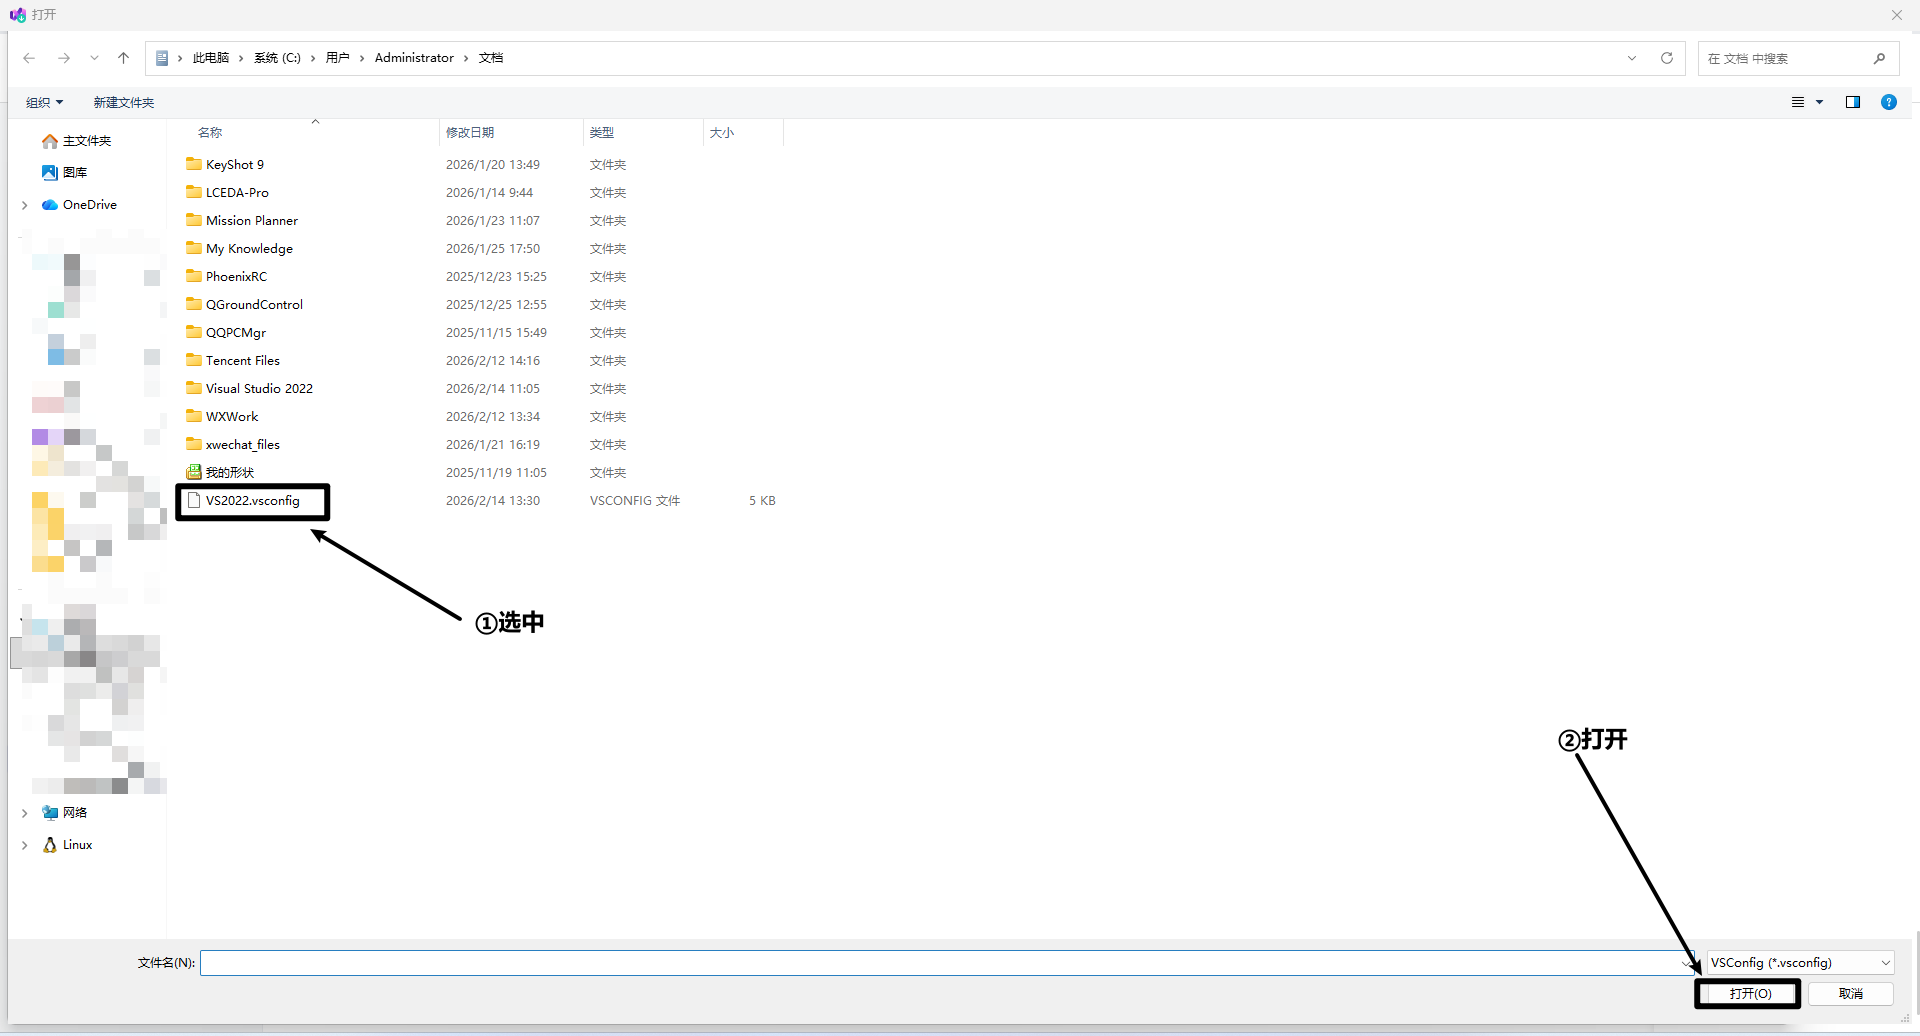
}将上述代码复制到记事本,然后保存为文件 VS2022.vscongfig
大家可直接下载保存的好的VS2022配置文件,如下:
VS2022.vscongfig (4.11 KB)
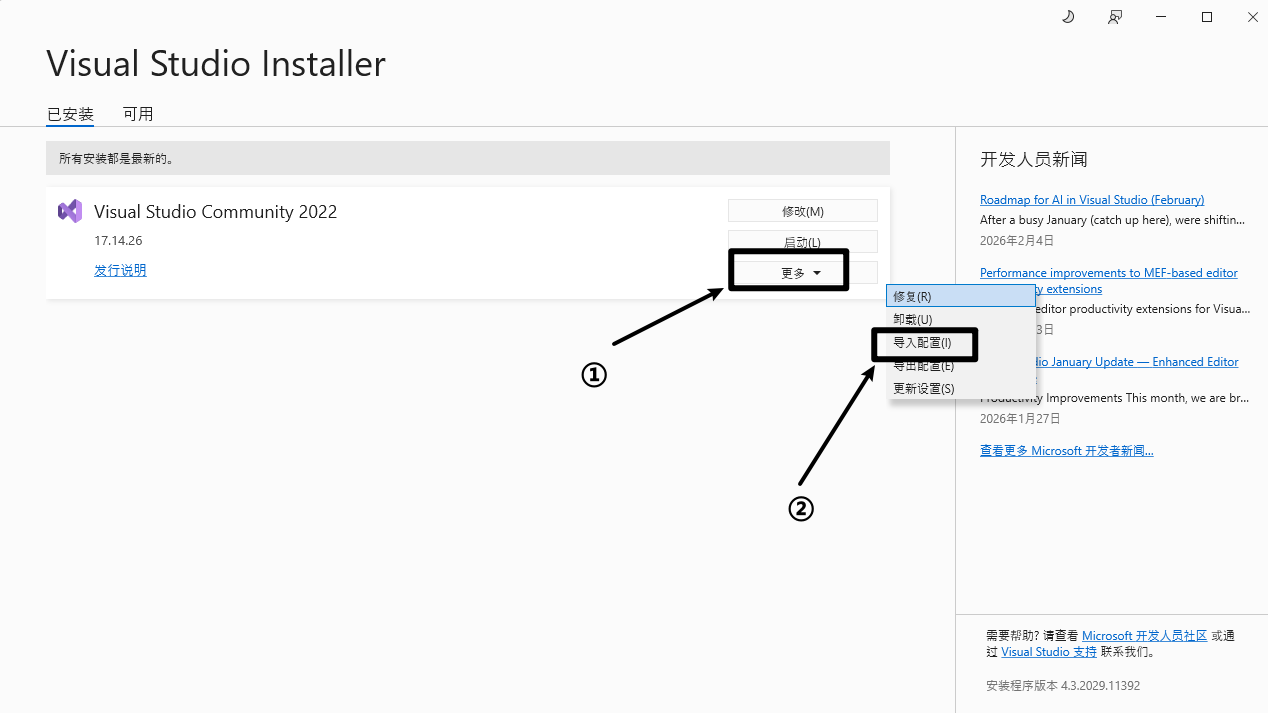
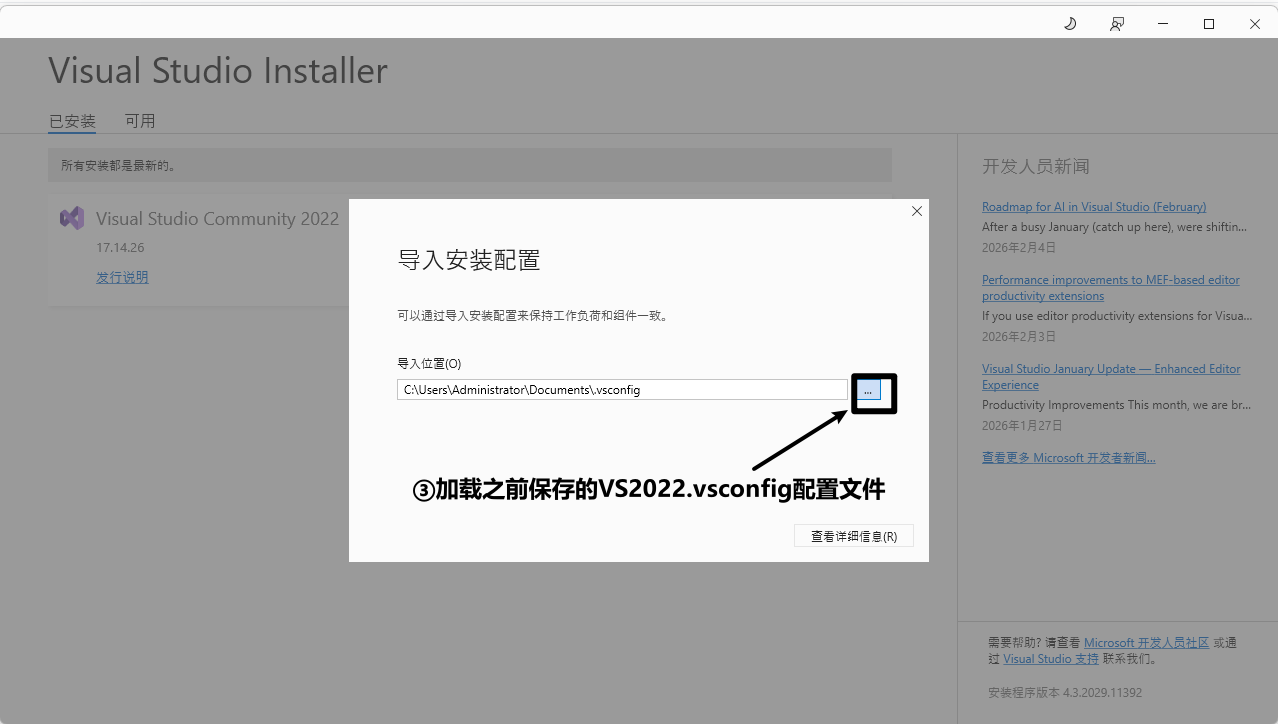
五、导入VS2022的编译配置文件
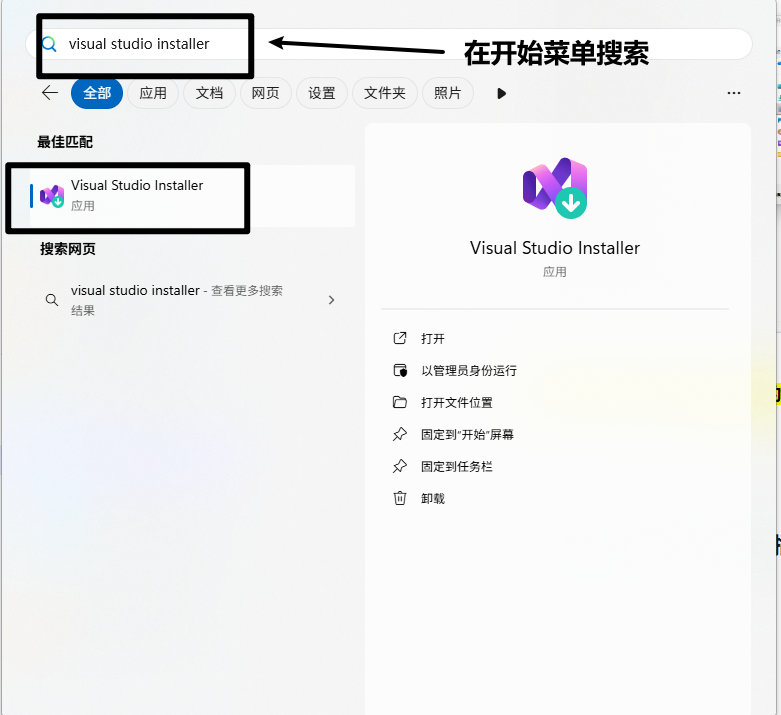
重新打开Visual Studio Installer。
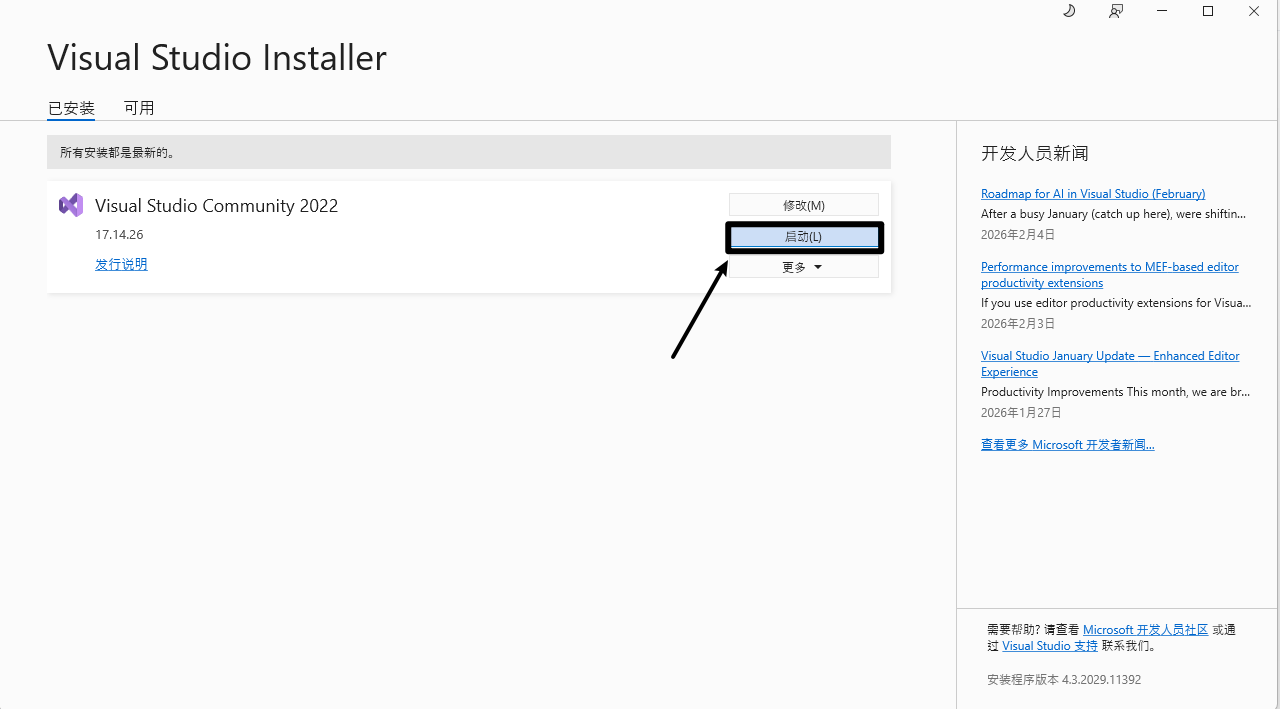
六、启动vs2022
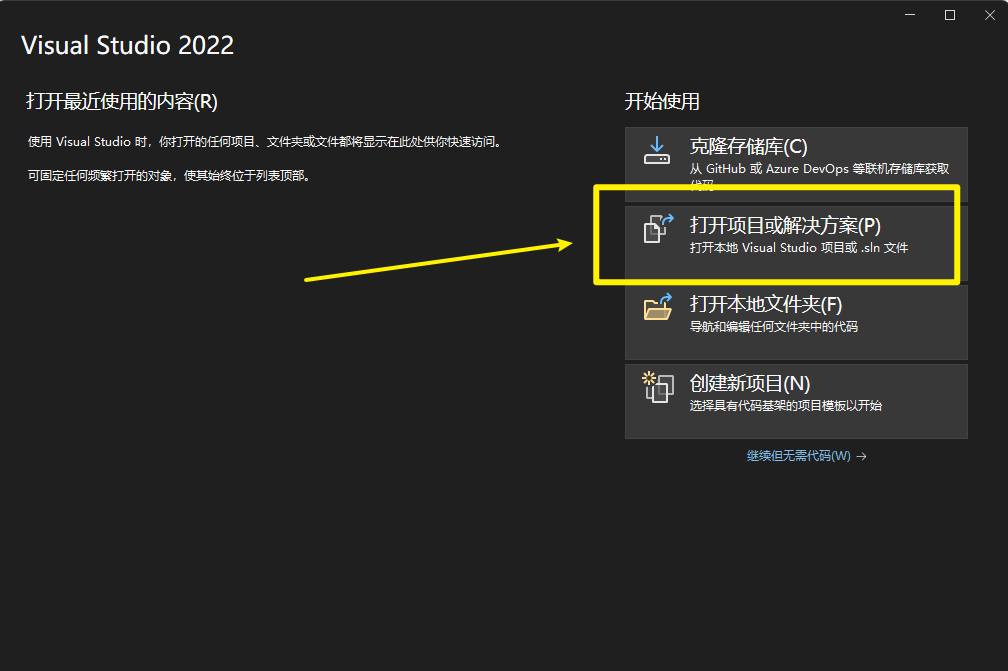
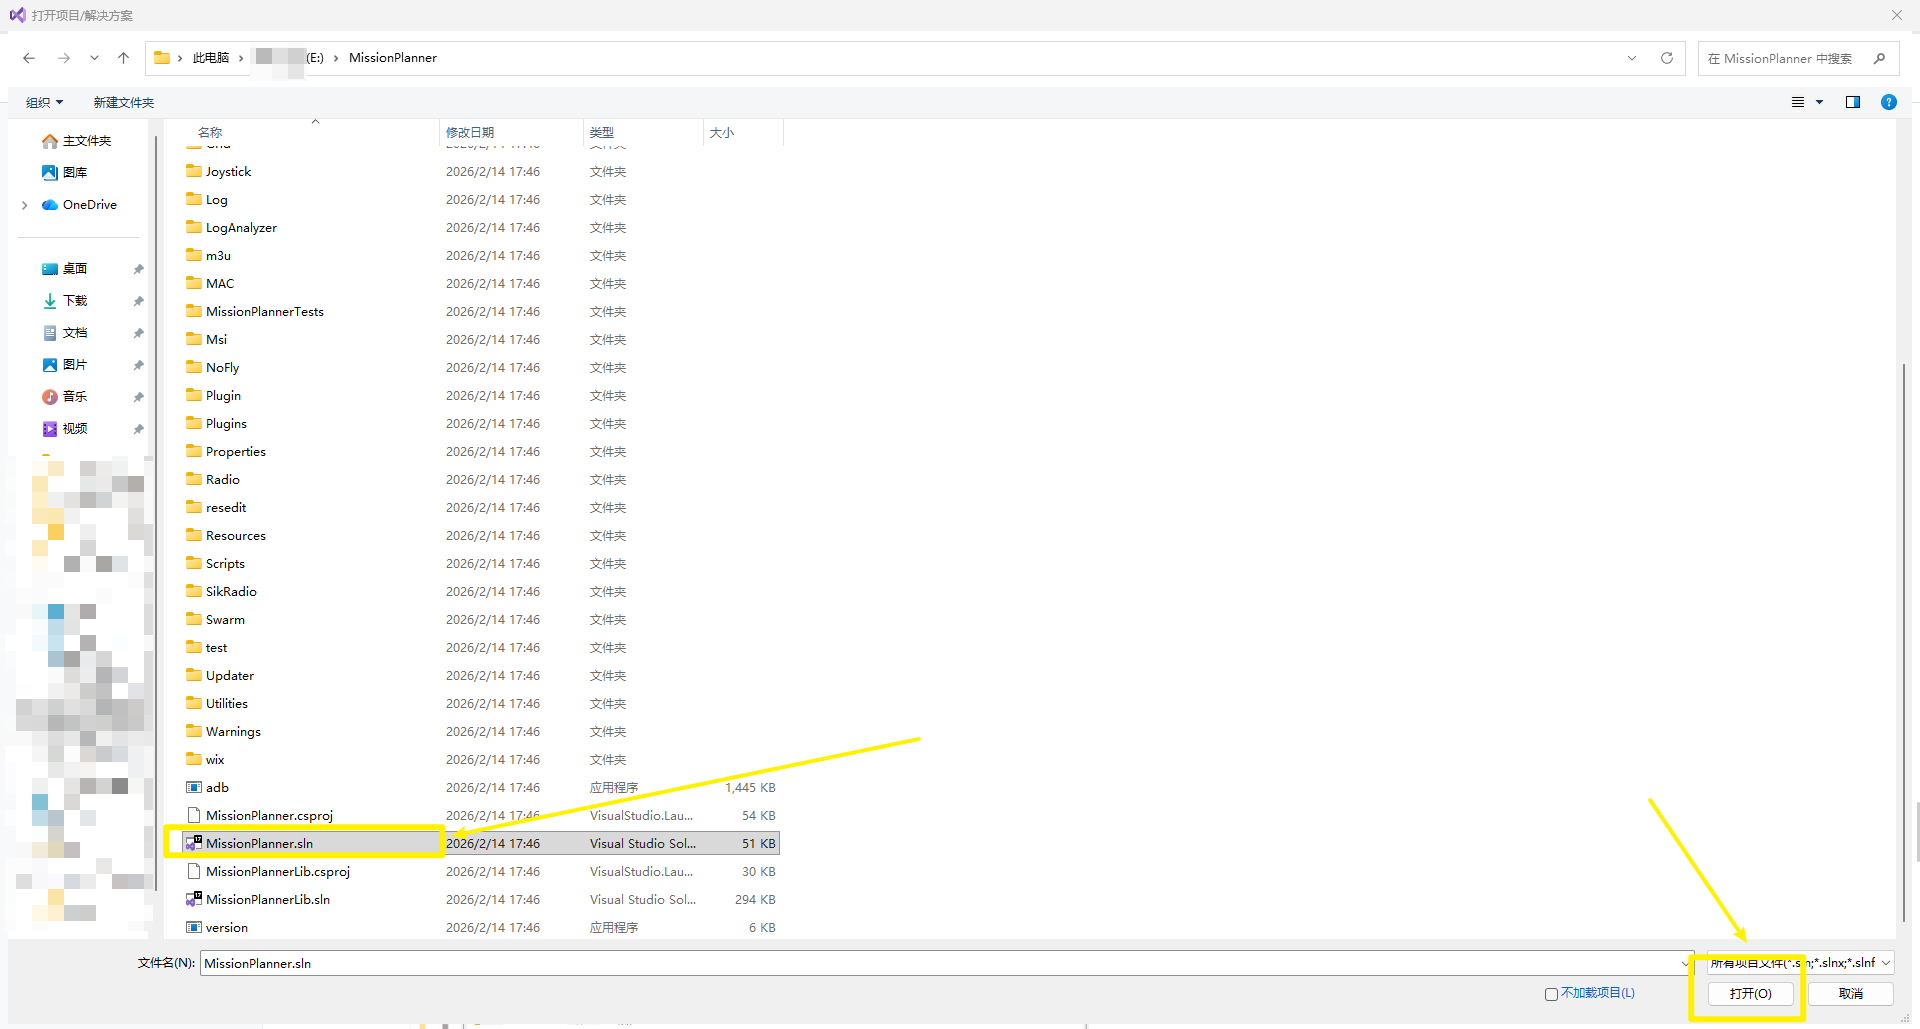
七、导入Missionplanner源码工程
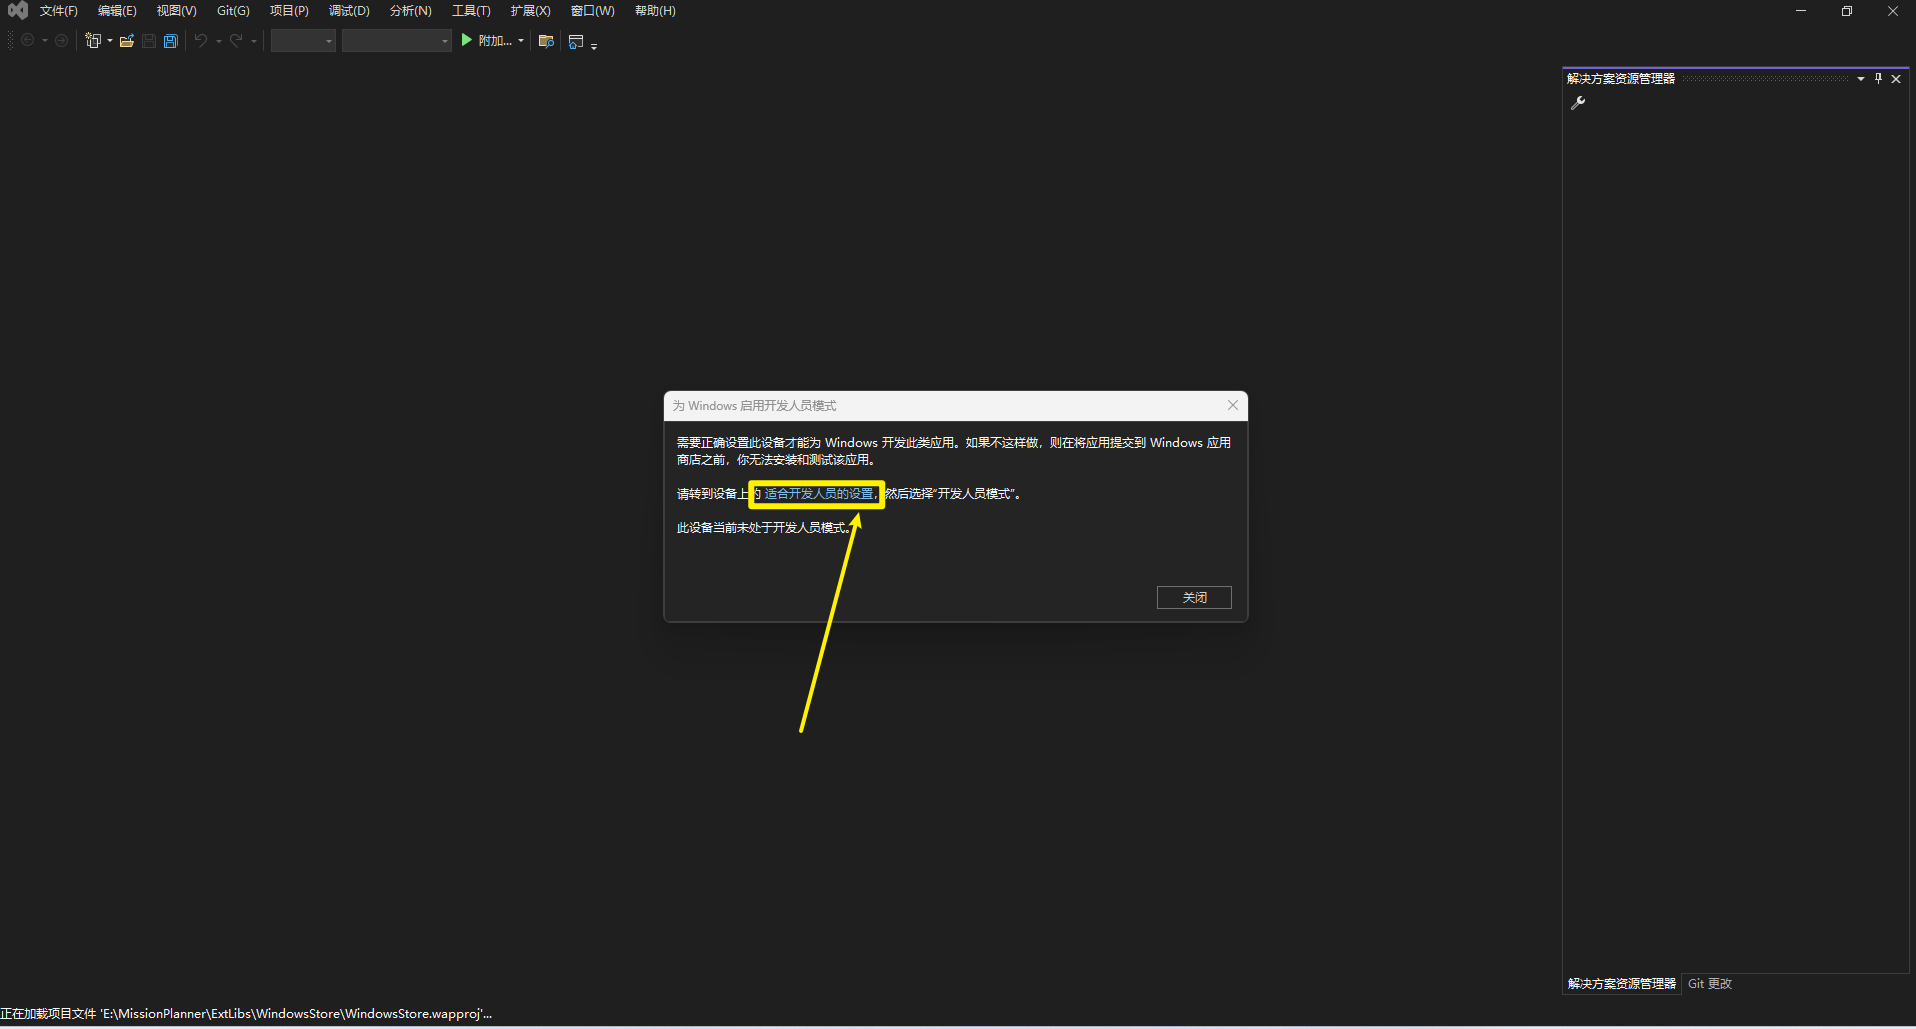
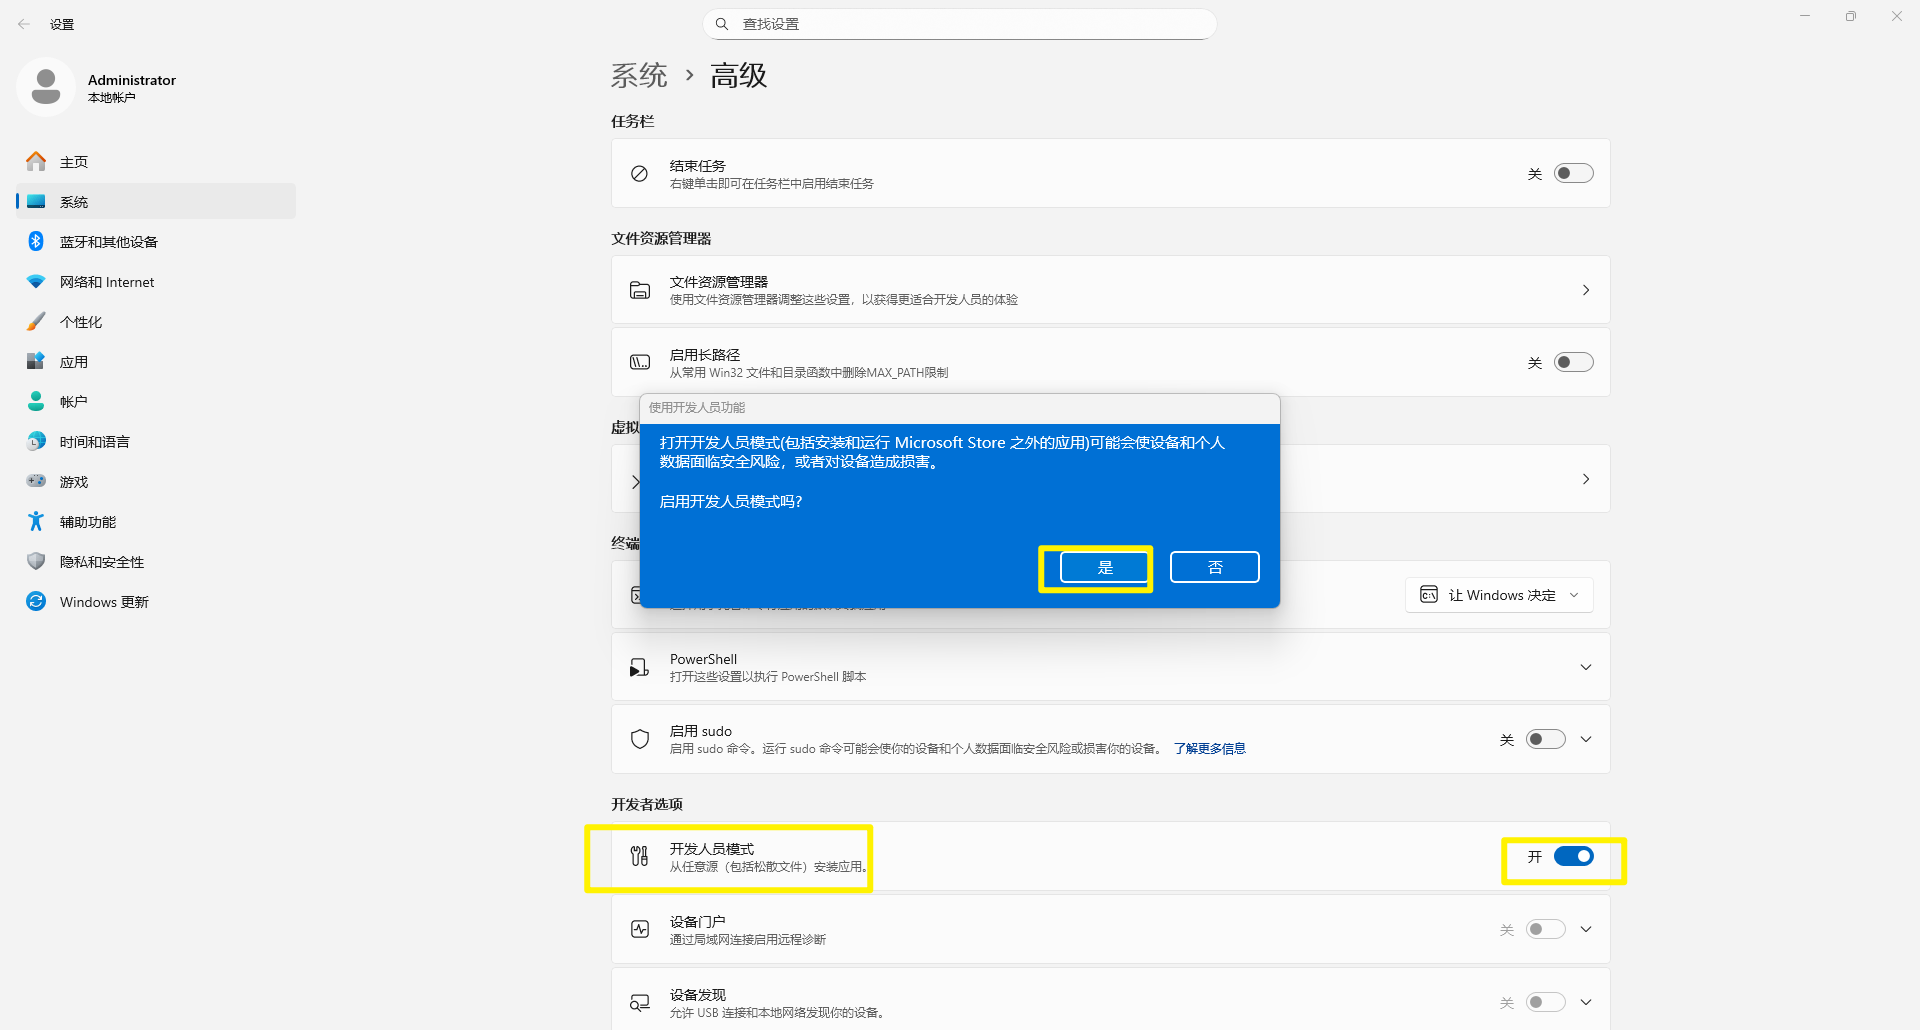
提示打开开发者模式,点击“适合开发人员的设置”
打开源码后,VS2022会拉取一些源资源,
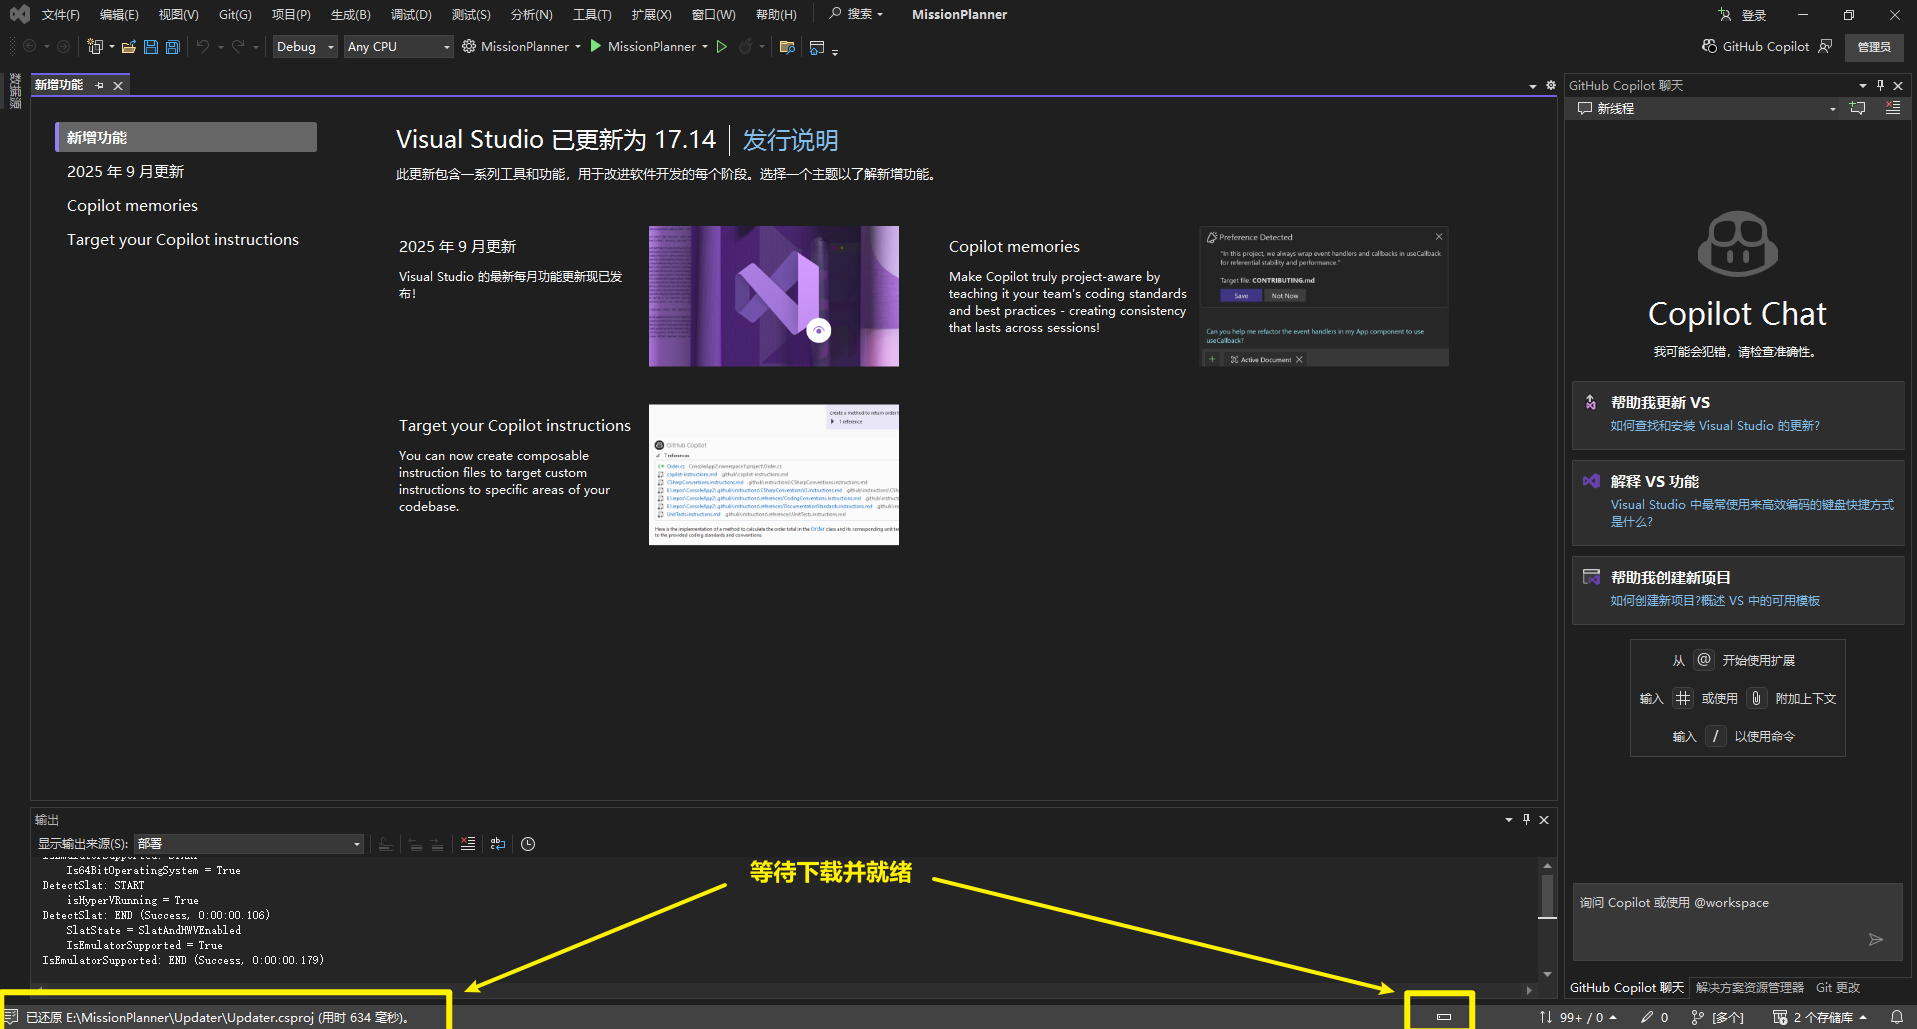
拉取源文件,就绪时如下图所示:

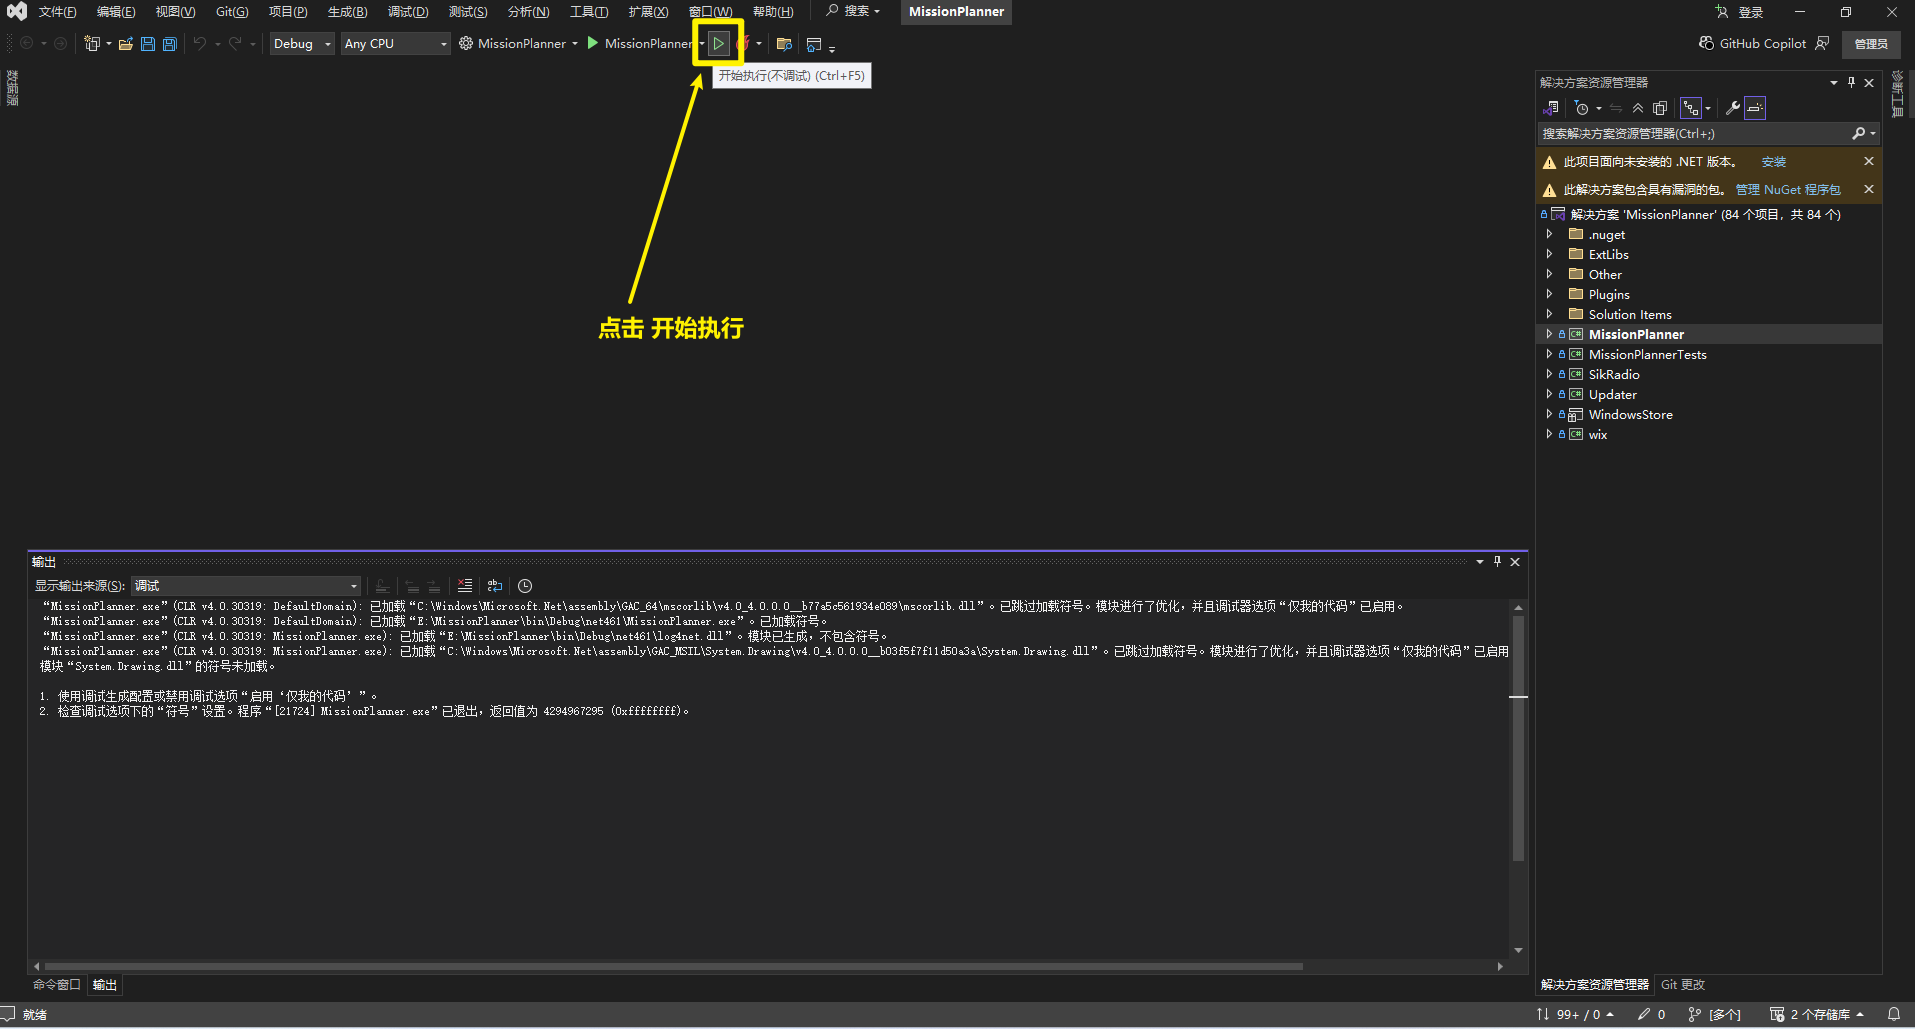
八、首次编译MP地面站
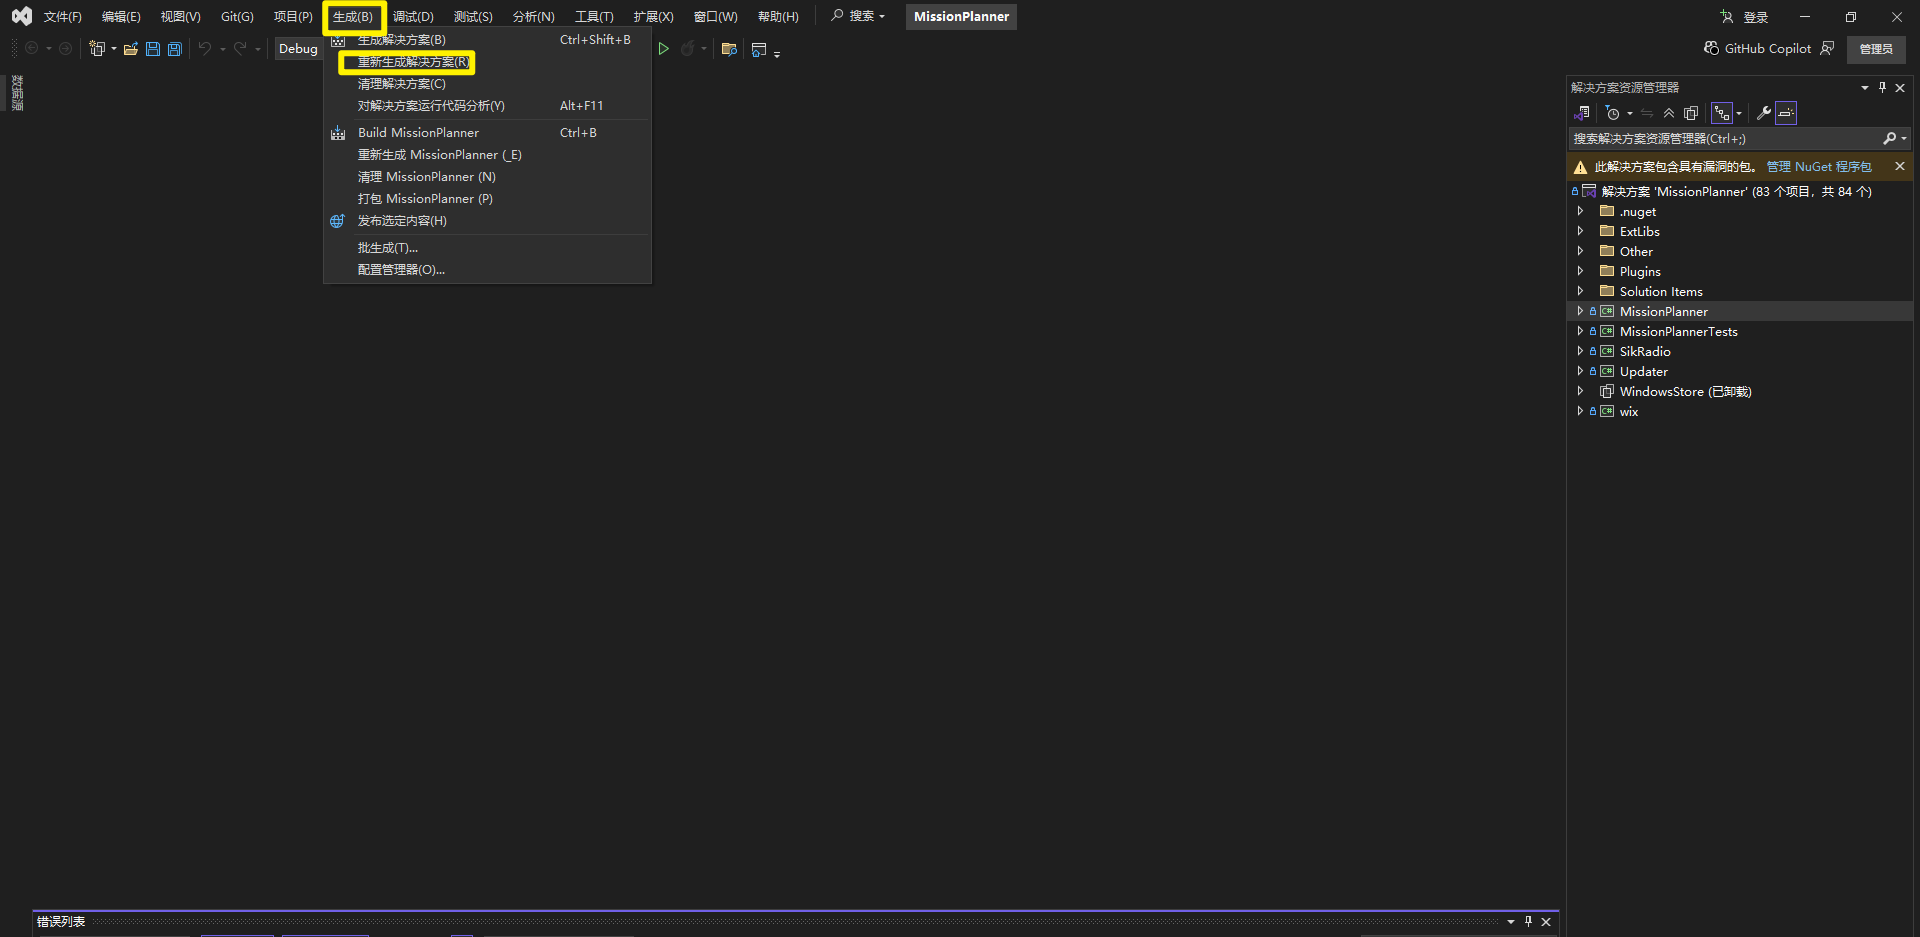
8.1 生成解决方案
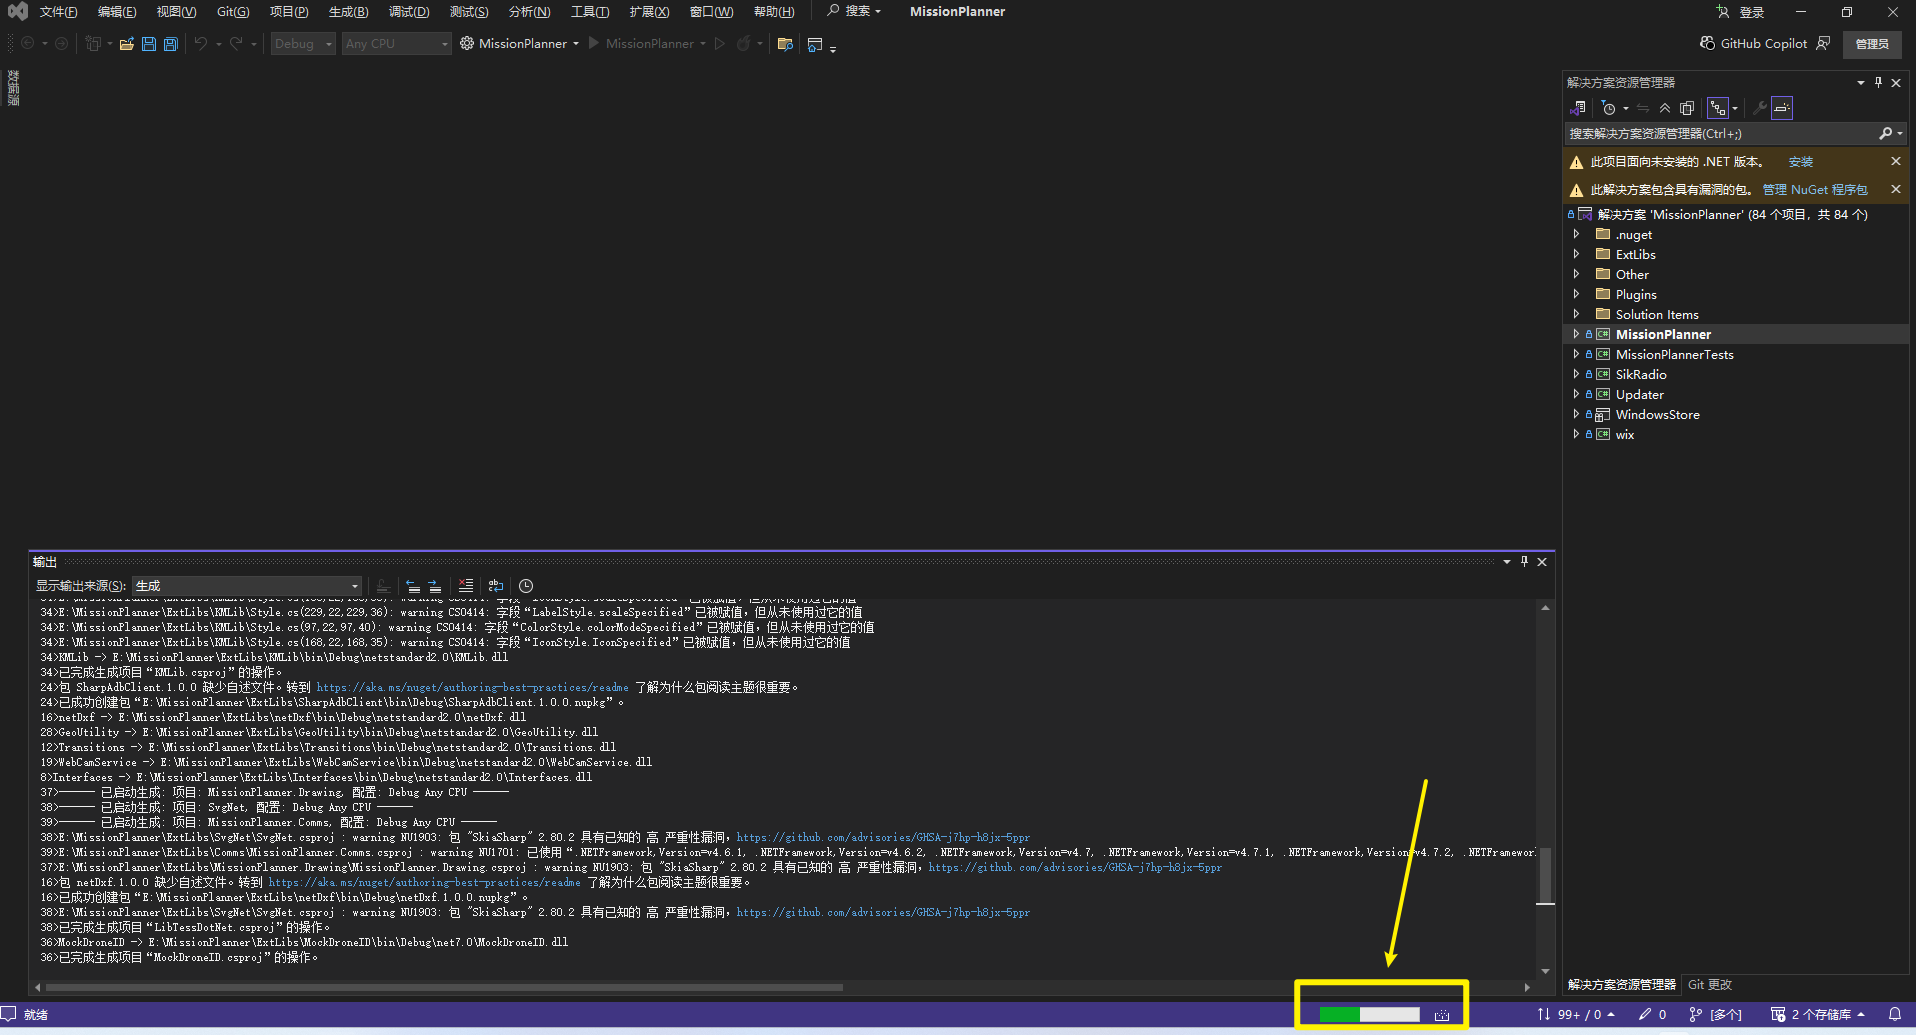
然后我们就可以开始尝试编译,下图所示,点击“生成”->生成解决方案"
编译开始时,会有进度条提示:
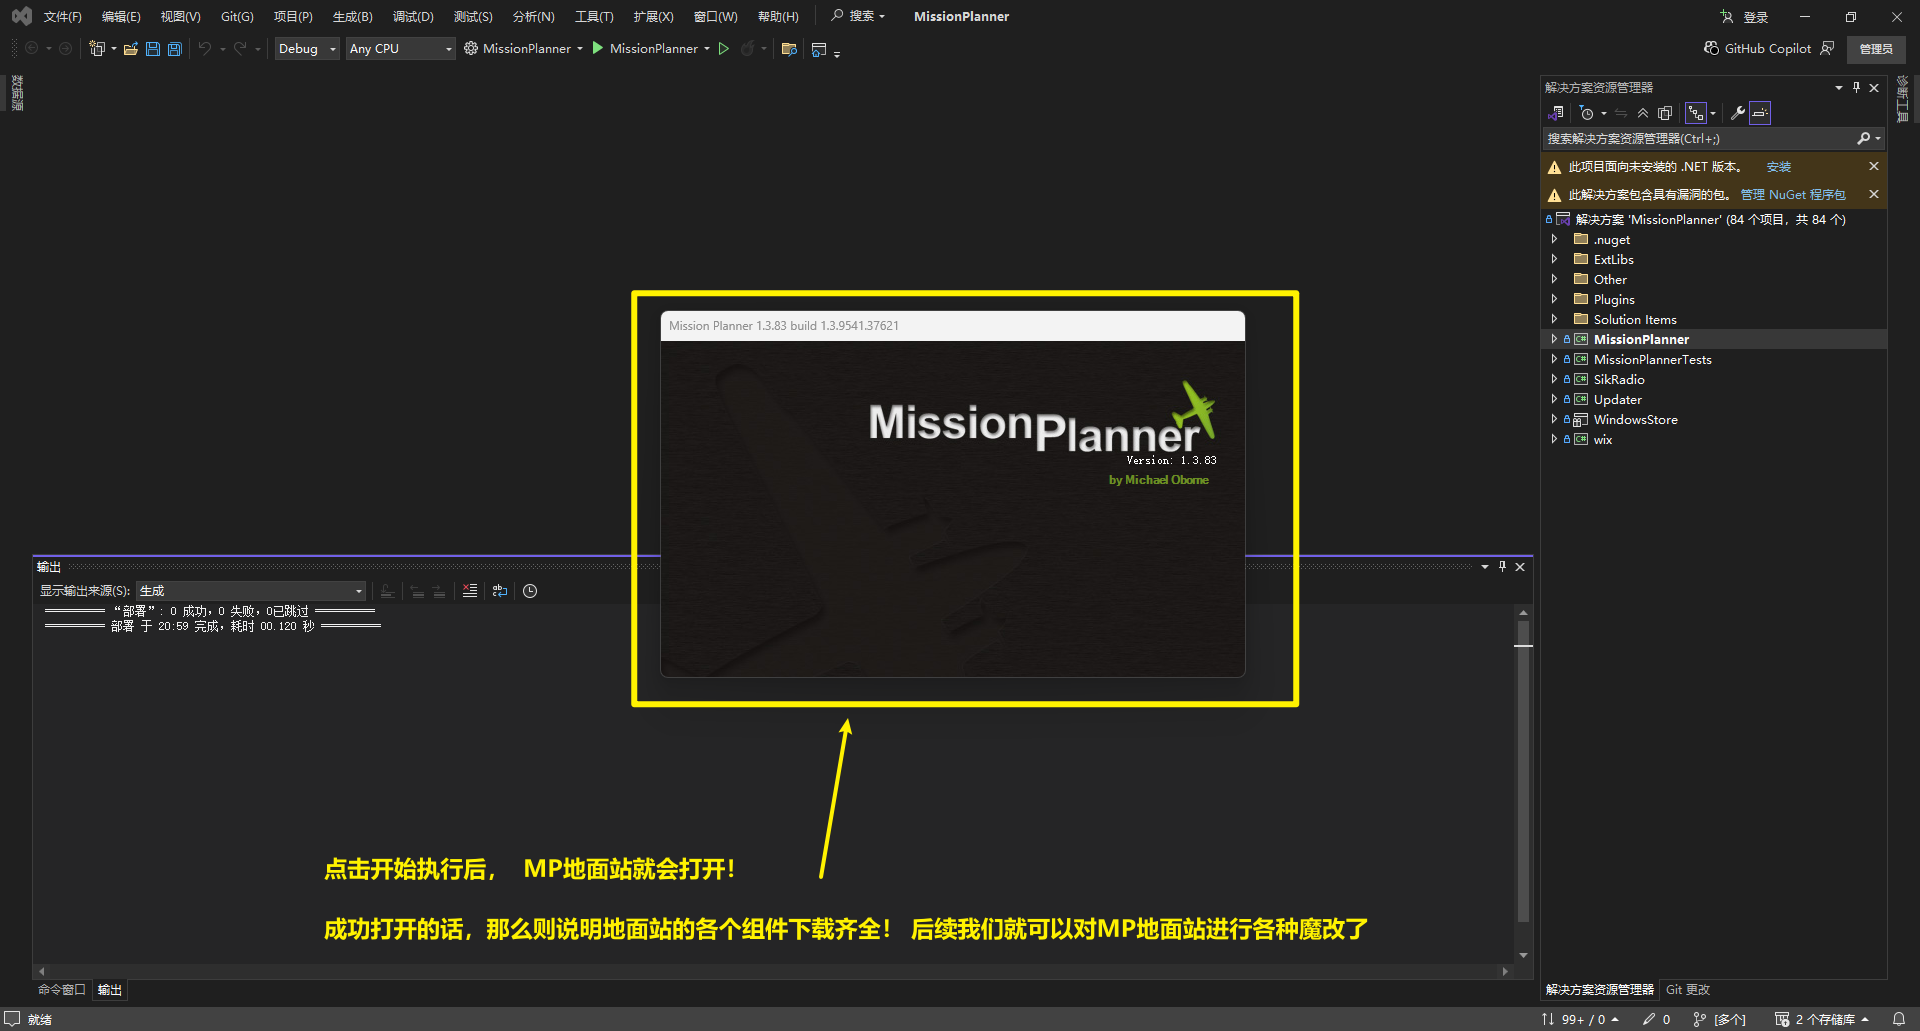
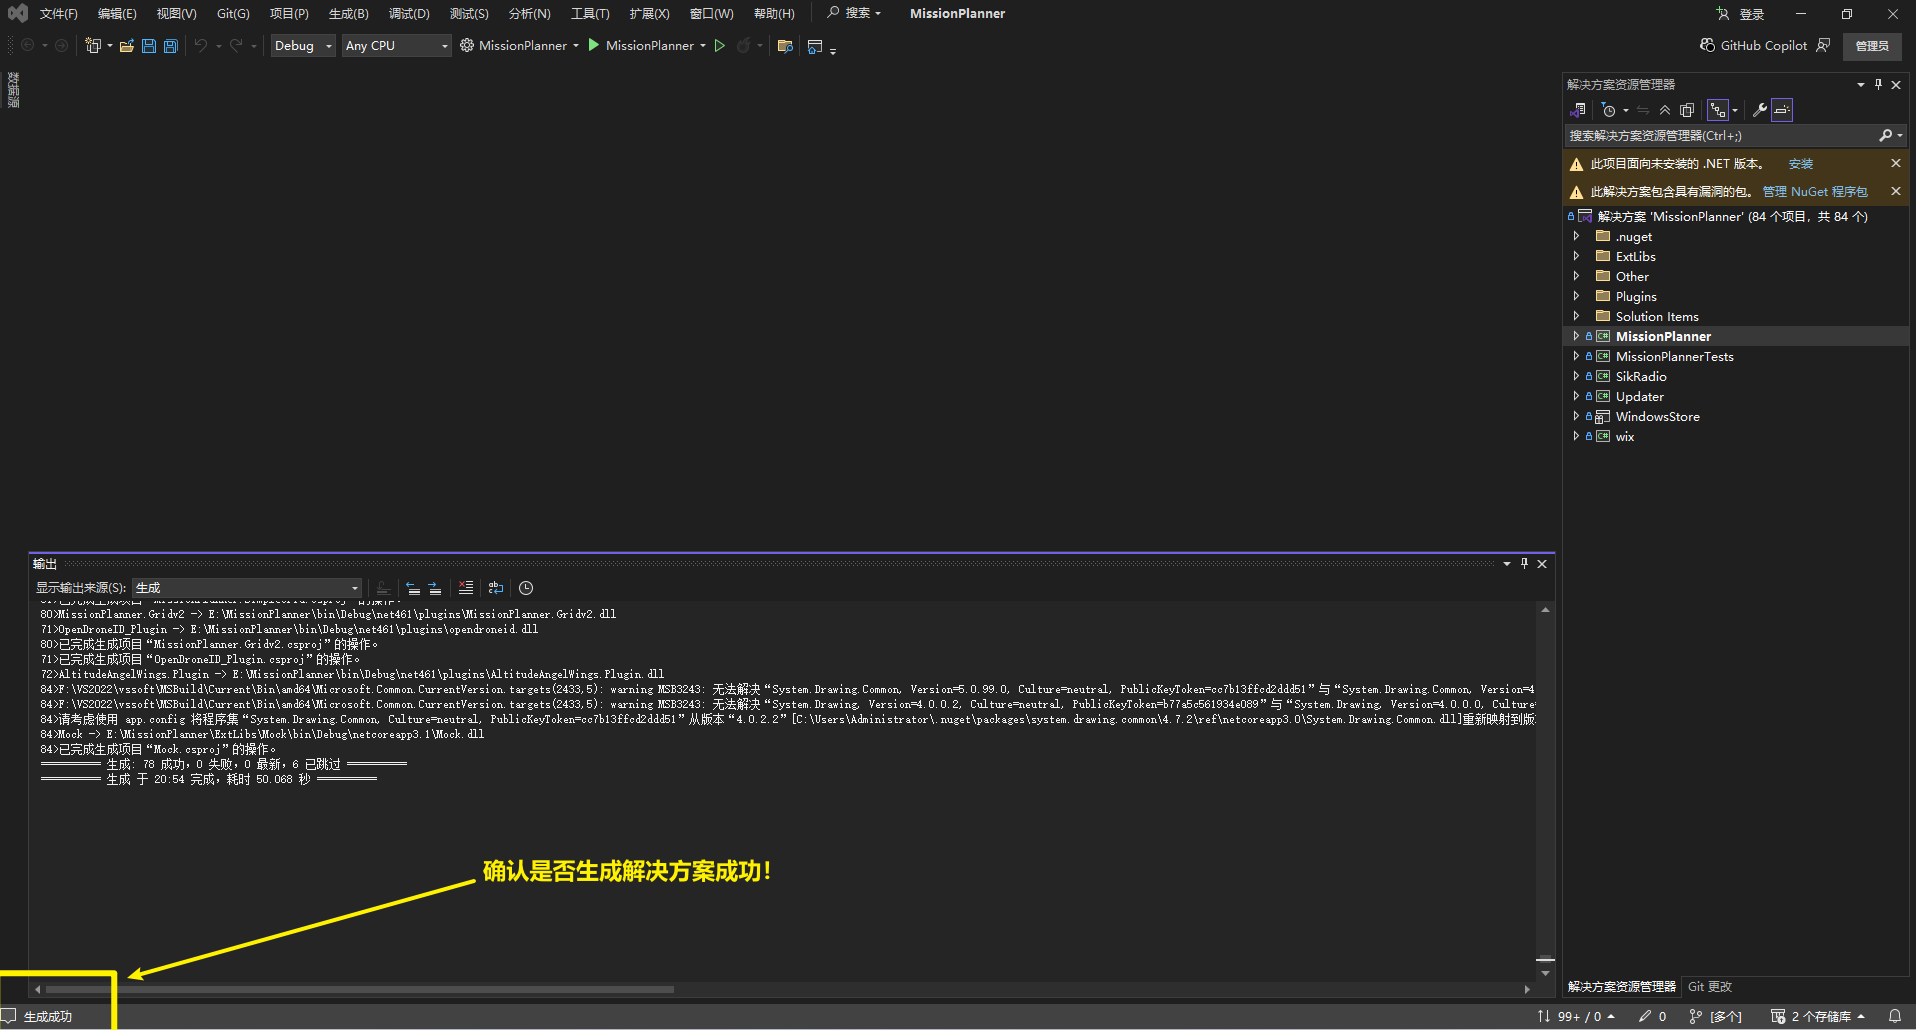
如果所有下载完成的话,会提示“生成成功”
8.2 运行MP地面站